> ## Documentation Index
> Fetch the complete documentation index at: https://docs.rendless.com/llms.txt
> Use this file to discover all available pages before exploring further.
# WordPress Integration
> Render dynamic og images in WordPress
We will guide you through the process of integrating Rendless with WordPress.
It is a simple process that requires some lines of code.
You will learn how to generate dynamic og images in WordPress using Rendless.
# Step 1: Create a template and prepare it
First, you need to create a template on the Rendless dashboard.
You can create a template by clicking on the "Create template" button on the [Templates page](https://rendless.com/templates).
Create a template with the desired design and content. Add variables to the template that you want to replace with dynamic data with the `{{variable}}` syntax.
Learn more about [dynamic images with variables](/essentials/variables).
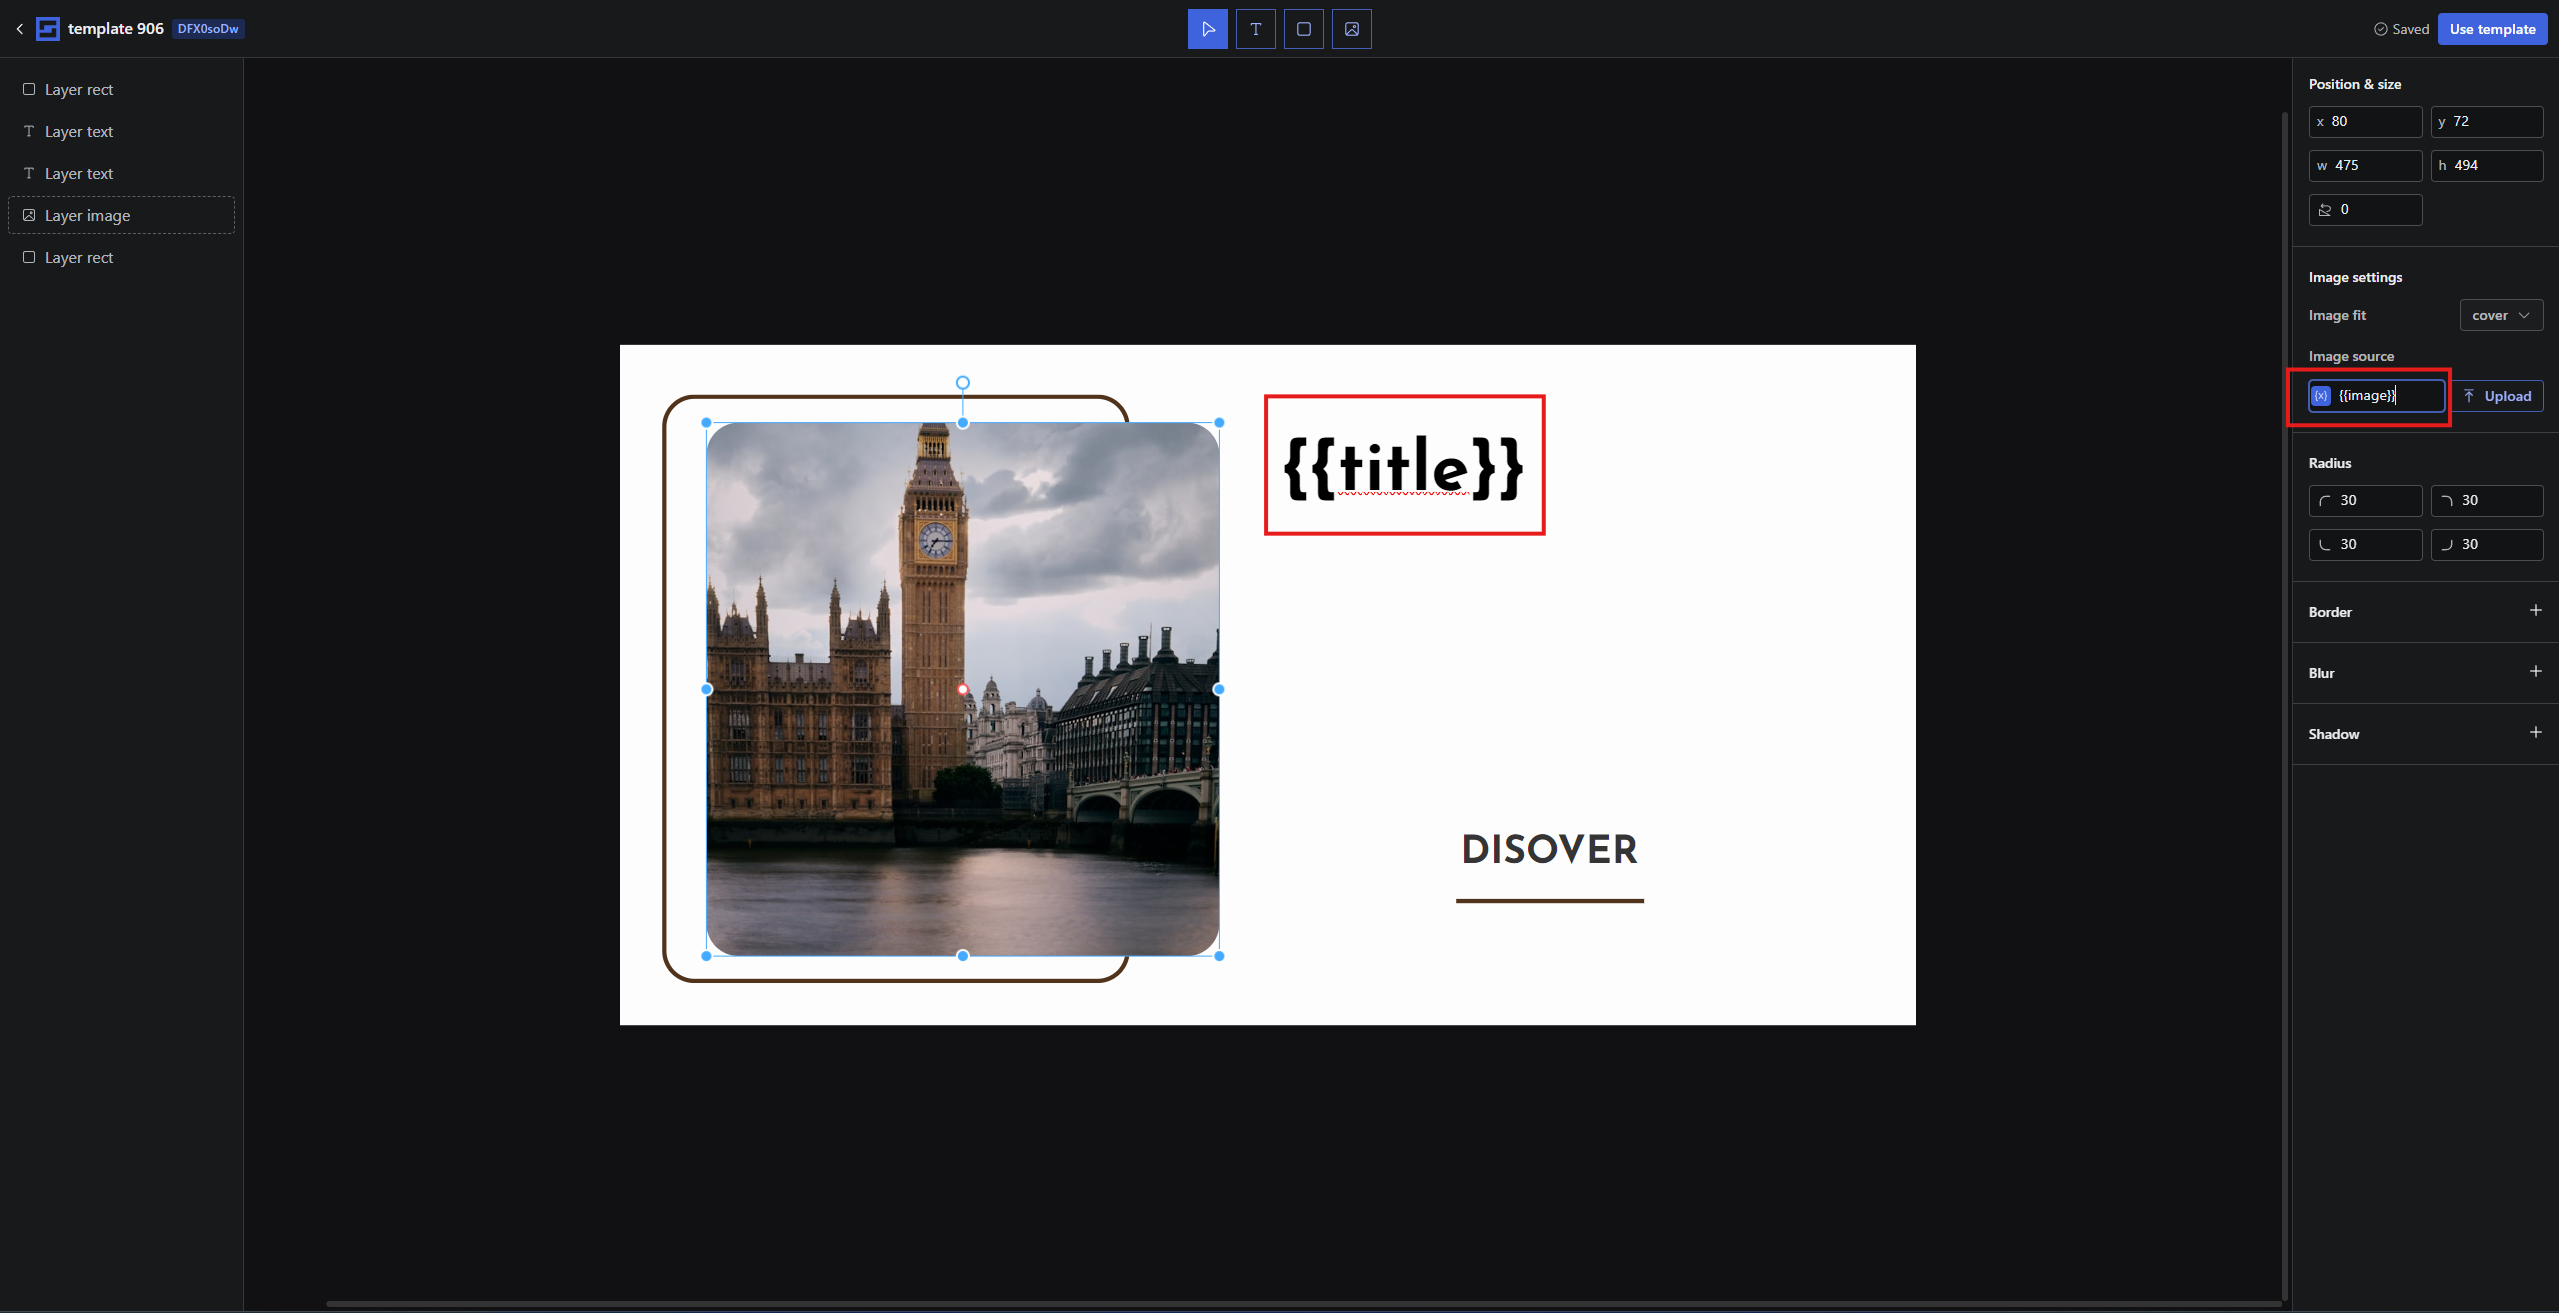 In the example above, the template has a title and an image. The title is marked with `{{title}}` and the image URL is marked with `{{image}}`. By default the template will render the title and the image URL that you have uploaded.
# Step 2: Get the image generation URL
You can now get the image generation by clicking on the use template button on the template editor page or in the template liste page.
In the example above, the template has a title and an image. The title is marked with `{{title}}` and the image URL is marked with `{{image}}`. By default the template will render the title and the image URL that you have uploaded.
# Step 2: Get the image generation URL
You can now get the image generation by clicking on the use template button on the template editor page or in the template liste page.
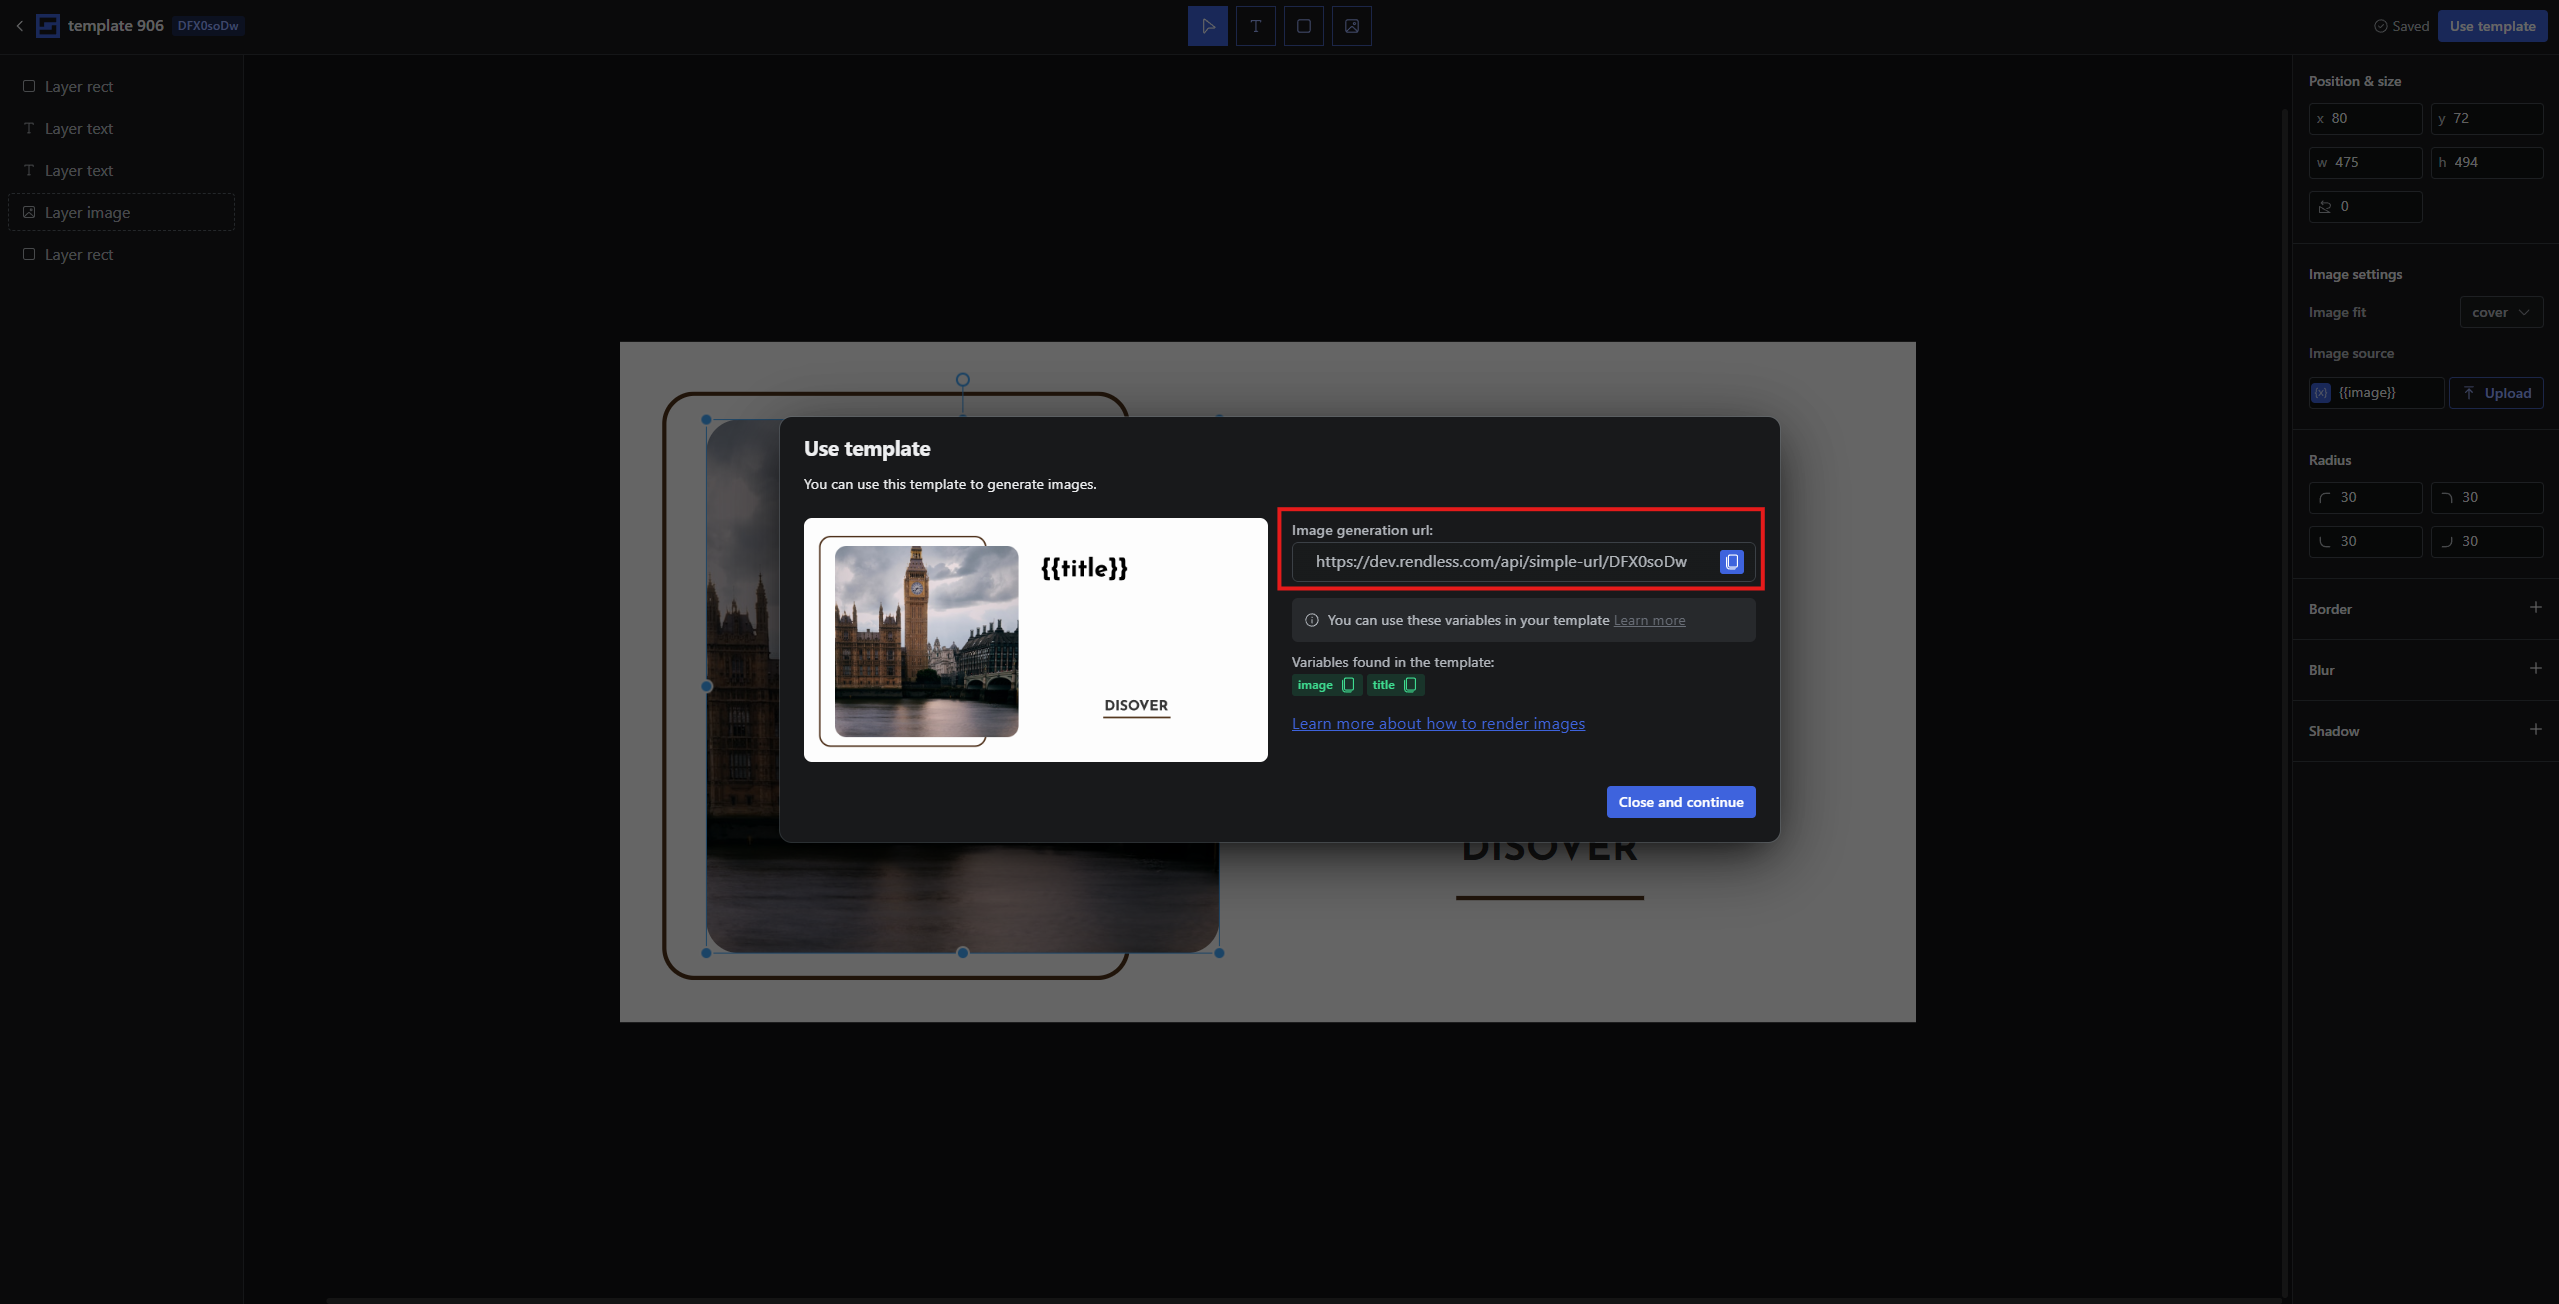 The image generation URL is the URL that you will use in WordPress to generate the image with the dynamic data.
It's just a simple URL like this:
```
https://rendless.com/api/simple-url/TEMPLATE_ID
```
You will need to replace `TEMPLATE_ID` with the ID of your template and provide the values for the variables in the query parameters.
```
https://rendless.com/api/simple-url/TEMPLATE_ID?title=Hello&image=https://example.com/image.jpg
```
# Step 3: Integrate the image generation URL in WordPress
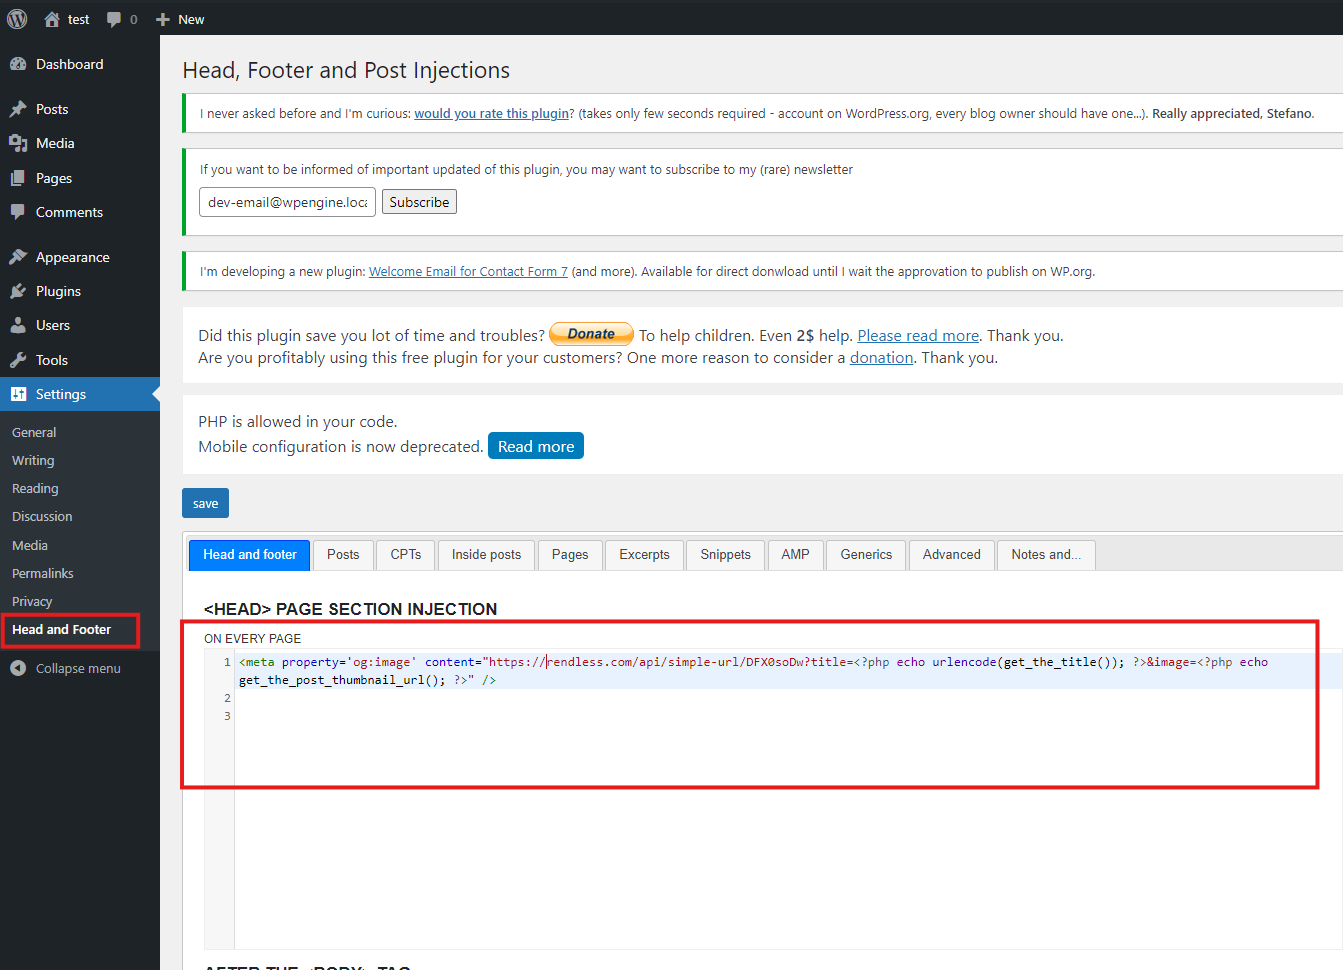
Now you have to add the image image generation URL in your pages meta tags like this:
It will dynamically get the post title and the post thumbnail URL and generate the image with the dynamic data.
Don't forget to encode the values with `urlencode()` php function.
```php theme={null}
```
You can do this by adding the following code in your theme's `header.php` file or use plugin to add the meta tags to your WordPress site.
We recommend using a plugin like [Head, Footer and Post Injections](https://wordpress.org/plugins/header-footer/) to add the meta tags to your WordPress site.
(If you are using this plugin, don't forget to enable PHP in the advanced tab)
Just add the php code in the head tag of your WordPress site.
The image generation URL is the URL that you will use in WordPress to generate the image with the dynamic data.
It's just a simple URL like this:
```
https://rendless.com/api/simple-url/TEMPLATE_ID
```
You will need to replace `TEMPLATE_ID` with the ID of your template and provide the values for the variables in the query parameters.
```
https://rendless.com/api/simple-url/TEMPLATE_ID?title=Hello&image=https://example.com/image.jpg
```
# Step 3: Integrate the image generation URL in WordPress
Now you have to add the image image generation URL in your pages meta tags like this:
It will dynamically get the post title and the post thumbnail URL and generate the image with the dynamic data.
Don't forget to encode the values with `urlencode()` php function.
```php theme={null}
```
You can do this by adding the following code in your theme's `header.php` file or use plugin to add the meta tags to your WordPress site.
We recommend using a plugin like [Head, Footer and Post Injections](https://wordpress.org/plugins/header-footer/) to add the meta tags to your WordPress site.
(If you are using this plugin, don't forget to enable PHP in the advanced tab)
Just add the php code in the head tag of your WordPress site.
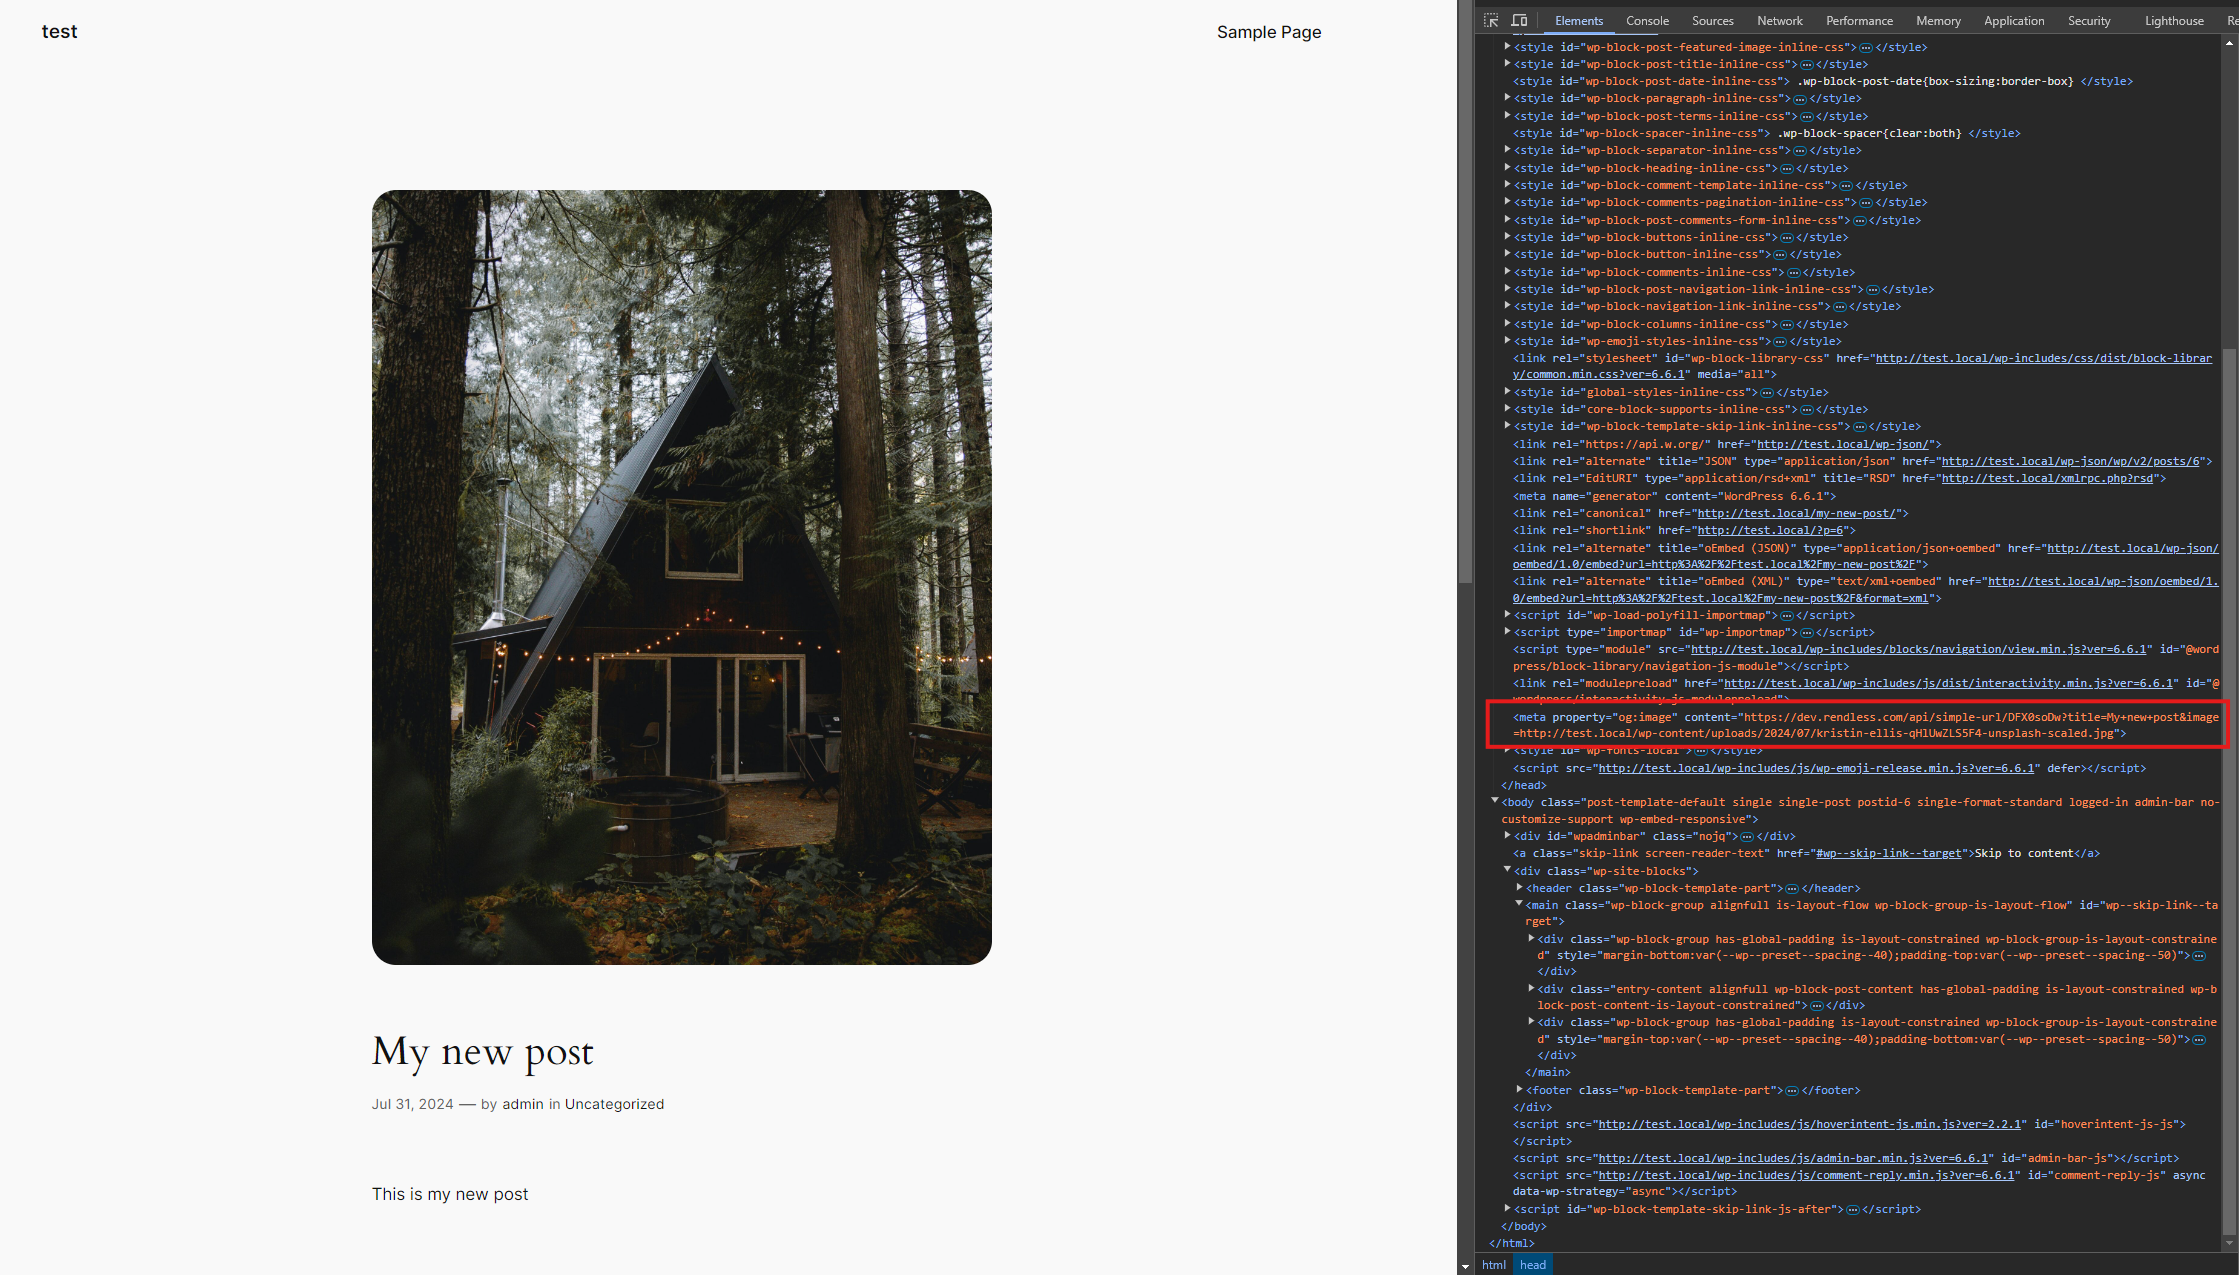
 You can now see the dynamic og image in your WordPress site in the head tag. Now when you share your post on social media, it will display the dynamic og image with the post title and thumbnail.
 The image generated: